All advice provided on this page is provided as-is, and without warranty. When in doubt, always follow the requirements and/or recommendations of your aircraft and component manufacturers.
The battery is a surprisingly neglected component of PPCs, and some of this has to do with the nature of traditional aircraft. Historically, an engine running a magneto will run regardless of the battery condition, so some folks dismiss it as being only important enough to starting the engine and ‘getting me in the air’. Once you’re running, who cares, right?
There are three things to consider here. The first is that newer engines may rely on electronics that require reliable 12v power (including fuel injection and the ECU, where the battery is mandatory). The second is that avionics and engine management systems, which modern pilots rely on heavily, still need reliable power. And the third is that although the battery may get you off the ground, what happens when it won’t crank over in the event of a mid-flight engine out (intentionally or unintentionally). It happens, even to the best of us.
The battery is fairly easy to maintain if you follow a few simple rules:
- Use a sealed, absorbed glass mat (AGM) battery, at a minimum. In an aircraft, a traditional vented lead-acid battery presents a plethora of problems we won’t get into here… just avoid them altogether. If you want to spend a little extra for a lighter weight Lithium-based battery, just make sure the battery selected is suitable for engine starting and its capacity is equal to or better that the AGM battery.
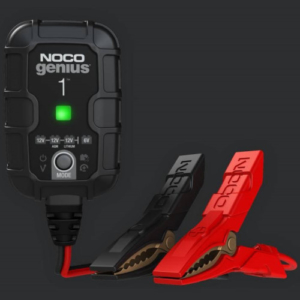
- Keep the battery on a ‘smart maintainer’. This is not the same as a trickle charger, which is essentially a ‘dumb’ charger that puts out a voltage slightly above normal. These can cause unexpected side effects to battery life, and most AGM batteries (if you read the fine print) are only warrantied when smart maintainers are used. Smart maintainers have intelligent electronics which monitor the condition of the battery and keep it at its optimum. Our current recommendations include the Deltran Battery Tender Jr. and the NOCO Genius 1. You don’t have a 120v power supply near your PPC’s storage location? Consider Deltran’s solar options (they’re expensive and we recommend the 850mA model, but they still provide a ‘smart’ charging system). if neither are a viable option, then we strongly suggest you consider making the battery easily removable so you can take it home to maintain it if/when the PPC is sitting for long periods.
- Replace the battery every 5 years. Sure, batteries can last well beyond 5 years, but why take the risk? This is cheap insurance and an easy task to perform at the annual condition inspection.
Know Your Coolant
Find out exactly what kind of coolant is used in your aircraft if you did not initially assemble and fill the cooling system yourself.
Not all coolant is chemically the same. There ARE different types. Despite this fact, we’ve encountered very lackadaisical attitudes towards the types of coolants used, including from the aircraft manufacturers, unfortunately.

Take a Deep Breath… Be Cool… Relax…
An intrepid owner picks up their new PPC with ‘orange’ coolant, but there was no label on the aircraft, and the pilot’s operating handbook (never updated for the particular engine provided with their unit) merely says to use a “50/50 phosphate free coolant”. Well, this describes just about every coolant variant now made today. So, our owner contacts the manufacturer for details, who responds to the owner to use – and we quote – “any brand 50/50 mix that is orange in color“.
We will now emphasis this basic fact: color is not a determinant of coolant chemistry. In fact, there are actually different orange-colored coolants that are completely incompatible with each other, and some which are not compatible with the ‘universal’ orange that you might also see on the store shelf.
Meanwhile, our owner happens to visit the engine manufacturer’s website where it clearly instructs PPC installers to use “Honda Long-Life Antifreeze/Coolant Type 2”, which is blue in color. Great. Who’s right? Who’s wrong? Is there an unwritten allowance for different coolant types despite the engine manufacturer’s published information? Or perhaps the PPC manufacturer is violating the manufacturer’s requirement?
I’m not worried – are you worried?
Aside from the fact that mixing different variants of coolant could decrease cooling performance or increase dissimilar-metal reactions and corrosion in the system, in some cases incompatible chemistries of the coolants (when mixed together) will react to actually turn the coolant into a gel, which inhibits flow of the fluid, causes the engine to rapidly overheat, and even possibly fail. An engine failure at altitude tends to ruin most peoples’ days.
So to summarize thus far, coolant types should be taken very seriously.
If the owner’s or maintenance manual of your aircraft does not explicitly state what was put into the engine, demand that the manufacturer provide to you – in writing – exactly what was used when the aircraft was constructed.
If you get no meaningful assistance from the PPC manufacturer (or they themselves don’t know, which can happen when they use whatever is on their shelf at the time they built your aircraft), consider either a.) having a chemical analysis of the coolant done or b.) doing a comprehensive system flush and starting anew and in accordance with the engine manufacturer’s specification.
Don’t take chances with such a critical engine subsystem.

Once you learn the correct type, put a weather/UV-resistant label on the coolant overflow bottle that specifies the coolant to use. This is not just a reminder for you, it also helps to ensure that if someone else is doing maintenance or repairs on your aircraft that requires draining the coolant or topping it up, they’ll know what to use!
Make Your Life Easier
We highly recommend the use of quick drains for both the engine and gearbox (if equipped), such as the popularly regarded Fumoto engine oil valves, or the Curtis and Saf-Air valves (both shown in their lock-open positions below). Aside from simply being easier, quick drains often have the following benefits:
- The ease of use encourages aircraft owners to properly do maintenance, at the specified intervals. There’s less of a tendency to procrastinate because “it’s too hard”.
- They reduce wear and potential thread damage from removing and installing drain plugs. Cross-threading mistakes can and do happen, but with the quick valve you’ll install it once and be done.
- They resolve access issues. Where traditional drain plugs can become ‘buried’ behind other components and cowlings that might require disassembly to get tools to it, the quick valve only needs finger access (and sometimes even less, like a small piece of metal tubing) to reach the handle.
- They dramatically reduce mess. Combined with a short piece of hose, fluids can be drained directly into old oil containers without the need for a messy drain pan, or the wind catching those trickles and sending oil spraying across your engine compartment. And because they are valves, you can more easily open them to do changes while the oil is hot, and you can temporarily turn them off to switch collection containers when full!
Propellers – we’re going to talk mainly about composite ones here, which are the most common on PPCs – require regular inspections and perhaps some occasional maintenance.
Maintenance on a prop needs to carefully follow the manufacturer’s guidelines and recommendations, and we should emphasize that this potentially becomes a gray area if you have an SLSA PPC, depending on what the propeller manufacturer actually qualifies as “maintenance” versus “repair”. Call or visit the manufacturer’s website to obtain the details on your particular propeller’s characteristics, and the processes for performing minor maintenance to it when chips and nicks occur (or when the propeller should be replaced, if bad enough). A couple of examples include:
- Hartzell Props has a manual with really good inspection procedures and a section on ‘repair limits’, and a YouTube video that really puts it all together. Note that the video goes MUCH further in the repair process than we would ever recommend for the average owner, but you’ll at least get an idea of what to look for and think about. We actually think the inspection discussion in here is a really good place to start for any aircraft owner regardless of the type of brand of propeller you own.
- Warp Drive describes performing maintenance activities on their website using alcohol (cleaning) and a high-quality, high-strength two-part epoxy to address small nicks and minor fiber damage. If you have a copy of their owner’s manual (example), they provide a bit more detail. If a significant amount of fiber is exposed or you just don’t feel comfortable with your inspection skills, you can send your blade(s) in for inspection and repair. A repair form can be downloaded from their website.
As for repair materials… Well, you’ll most often hear old-school pilots discuss a mixture of baking soda and Super Glue for such repairs. We DO NOT recommend this solution as a general approach. The reason is simple: cyanoacrylate formulas are susceptible to a wide array of compromises in strength depending on the environment and long term exposure to heat, moisture, and various chemicals. Don’t believe us? Just take a look at the link to the Permabond data sheet below… even the manufacturer recognizes this. Our props are exposed to too many varying factors, and we don’t think it’s the best option. We only list the solution here because some manufacturers in fact still have it as an acceptable alternative, and some folks will refuse to budge from the old adhesives no matter what the facts say.
Cyanoacrylates
We must emphasize that a.) there are various formulations of cyanoacrylate, and b.) this solution is not appropriate for all composite blades. Some composites are built with more flexibility, and need a proper adhesive that flexes with the superstructure.
Consider Permabond® 735/737 Cyanoacrylate or Loctite® 495 (equivalent to CM71, which is widely used in aerospace) combined with either baking soda or talcum powder. The Permabond adhesives are actually black in color, so that’s a nice touch. Some people will swear that any ol’ glue will do, but we prefer the specific formulations.
Remember, do not use this approach unless the manufacturer indicates it as an allowable option.
Two-Part Epoxies
The go-to solution probably has to be Permabond® ET5428 Black and ET5429 Black (thicker). Aerospace-approved, CFP-formulated, paste-like, strong, and cured black color, it checks all the boxes for that ideal prop repair. The only issue is that it can be hard to track down, and a little pricey when you do. 3M™ Scotch-Weld™ Epoxy Adhesive DP420NS is another good alternative, but the pricing is most often even worse.
Some folks recommended the Devcon® 14240 5 Minute Epoxy because it was also often recommended by aircraft manufacturers for various uses… the disappearing blue assures you fully mixed the parts, has a non-sag consistency, low-shrinkage for gaps, and still has good strength.
However, as a better alternative we’ve started to become more ‘attached’ (sorry about the pun) to PC-SuperEpoxy® Translucent Epoxy Paste – it’s usually much cheaper, often more readily available from big box stores, a little thicker, actually a little stronger, and also has the color change mixing to assure you get a good result. The paste is so thick, you can even put a little of each part on wax paper and weight it if you’re a serious perfectionist about perfect ratios.
In conclusion, always keep in mind: if at any point you feel the damage is more concerning or more complicated than you think you can handle, don’t take chances, and send it in.
We believe in keeping spark plug maintenance simple: spark plugs are generally cheap and easy to replace, so when you encounter a problematic one, just replace it. We don’t recommend re-gapping them (and per the manufacturers, newer designs like iridium-based plugs should NEVER be manually adjusted anyways), and in many cases the time and effort to clean them is better spent flying. Just remember to always use an anti-seize compound on the threads if you have plans to remove them in the future, or would like to do so without removing the threads from the head. A little anti-seize goes a long way.

For those of you flying with the Honda Viking 130 engine, here’s a complete spark plug guide (including torque specifications):
Honda Viking 130 Spark Plug Maintenance Guide
If you didn’t know, the Honda engines are solid enough that Honda says you don’t even need to think about the spark plugs until 30,000 miles… and then the only reason to ever look at them (i.e., remove and inspect) is if engine seems to be running rough or otherwise ‘sounds funny’. That equates to about 500 engine hours in a PPC before you need to start considering them!